Sunday, October 30, 2011

Pumpkin Roll Cupcakes and Apple Butter Pecan Cinnamon Rolls

This weekend, I was in a baking mood and made some yummy Fall treats....Pumpkin Roll Cupcakes and Apple Butter Pecan Cinnamon Rolls. I found the Pumpkin Roll Cupcake recipe on Pinterest, and I just experimented with a can of crescent rolls for the Cinnamon Rolls. Both recipes turned out amazing! I took them to our Sunday school class today, and I think the Apple Butter Cinnamon Rolls were gone in 5 seconds.

Have a Blessed Week my friends! You are dearly loved by your Heavenly Father and prayed for with love!


Psalm 118:15
Songs of joy and victory are sung in the camp of the godly. The strong right arm of the Lord has done glorious things!


Pumpkin Roll Cupcakes
Ingredients:
1 cup sugar
3/4 cup all purpose flour
1/2 teaspoon baking powder
1/2 teaspoon baking soda
1/4 teaspoon salt
1 heaping tablespoon pumpkin pie spice
3 eggs
1 cup canned pumpkin

Icing:
8 ounces cream cheese, softened
1 cup powdered sugar
1/2 cup butter or margarine, softened
1 teaspoon vanilla

Instructions:
1.Place 12 cupcake papers in a 12 cup muffin tin.
2.In mixing bowl, place sugar, flour, baking powder, baking soda, salt, and pumpkin pie spice. Stir with a spoon until well combined. Add in eggs and pumpkin. Mix with an electric mixer until smooth.
3.Divide evenly among 12 muffin cups.
4.Bake at 350 for twenty minutes, or until center springs back when lightly pressed.
5.Remove from oven and allow to cool completely.
Icing
6.To make the icing, place butter or margarine, cream cheese, powdered sugar and vanilla in a mixing bowl. Beat with electric mixer until smooth and creamy.
7.To fill cupcakes (Optional), place icing tip in corner of a freezer grade zipper seal bag (it is best to enforce the corner of the bag with tape beforehand). Snip off tip of bag so that only the very end of the icing tip is sticking out. Fill bag with half of icing.
8.Press tip down into the center of each cupcake and give a little squeeze to fill. Repeat with all cupcakes.
9.Spread remaining icing on top of all cupcakes. Store in the refrigerator.


~~~~~~~~~


Apple Butter Pecan Cinnamon Rolls
Ingredients:
1 can Pillsbury Crescent Rolls (8 count)

1/2 cup Apple Butter

1/2 cup crushed pecans


Frosting:
4 oz softened cream cheese
1/2 Cup powdered sugar
1/2 teaspoon vanilla
1 Tablespoon apple butter


Directions:Preheat oven to 350 degrees. Unroll crescent dough into one long rectangle, sealing the perforations with your fingers. Spread the apple butter over the dough (leaving a one inch border of dough). Sprinkle crushed pecans on top. Roll up the dough into one log starting with a short end. Cut into eight slices and place on a greased baking pan, with roll edges touching. Bake 15-20 minutes, until slightly browned on the edges. Make your icing while the rolls bake.


For the icing: Mix all icing ingredients in a large bowl until smooth. Spread over warm rolls. Serve rolls warm.

Saturday, October 29, 2011

Pinterest Challenge Contest-I could use your Vote :)!

Hello friends! I could use your help. I recently entered a Pinterest Challenge Contest and the voting is taking place now.

If you have an extra moment, please vote for my recipe. My entry is picture number 3 and it has my name under it (Christina Burrell). My recipe is for the recent post,pumpkin spiced cream cheese cinnamon rolls. Just click on "vote" above my name and entry.

http://imtopsyturvy.com/pinterest-challenge-link-party/

Thanks so much! And, after you vote, make the recipe-they are yummy and super easy!Here is the link to the recipe: http://butterflykissesntastydishes.blogspot.com/2011/10/celebrate-october-with-pumpkin-spiced.html

Blessings!

Friday, October 28, 2011

P31 Guest Posting


I am blessed to be sharing some of my favorite quick and easy breakfast recipes on the weekly "Where in the World is that Proverbs 31 Lady" series over at one of my favorite blogs, "I Love My 5 kids"


Check it out, and while you are there, subscribe to the blog...Lana posts great recipes, homeschooling tips, craft projects, financial advice, spiritual wisdom, and home improvement ideas. Have a Very Blessed Weekend!

Saturday, October 22, 2011

Pumpkin Granola-Share the Blessing of Autumn


I love all things pumpkin so when I saw this recipe for Pumpkin Granola on one of my favorite blogs, Two Peas and their Pod, I knew I had to make a huge batch to share with my friends. I tripled this recipe and put it in adorable Autumn-themed containers that I found at the Dollar Tree. I plan to distribute it to my friends and neighbors along with a jar of my homemade hot cocoa mix.

The granola was super easy to make, and my home smelled amazing as the cinnamon and nutmeg aromas spread while baking. This granola would be the perfect topping on a bowl of yogurt for breakfast or a bowl of cinnamon or vanilla ice cream for dessert. You could also put it in ziploc bags to carry as snacks or eat it as cereal in the mornings. Not only can the pumpkin granola be used in many ways, but it is super healthy too! The pumpkin, applesauce and maple syrup replace the need for oil or butter. I replaced the pepitas in the original recipe with roasted sunflower kernels but you could also use almonds or crushed pecans.

Bake a batch for yourself and share some with your friends and family. Attach a handwritten note or scripture verse and share the Love of God with someone who may need His touch in a special way. My favorite scripture to include with food gifts is Psalm 34:8, "Taste and See that the Lord is Good."

Happy Autumn my dear friends! You are dearly loved by your Heavenly Father!

Pumpkin Granola

Ingredients:
5 cups rolled oats
1 teaspoon pumpkin pie spice
1 teaspoon cinnamon
1/4 teaspoon nutmeg
3/4 teaspoon salt
3/4 cup brown sugar
1/2 cup pumpkin puree
1/4 cup applesauce
1/4 cup maple syrup
1 teaspoon vanilla
3/4 cup dried sweetened cranberries
1/2 cup pepitas or sunflower kernels or almonds or crushed pecans

Directions:
Preheat oven to 325 degrees. Line a large baking sheet with parchment paper and set aside, In a large bowl, combine oats, spices, and salt.
Mix well. In a medium bowl, whisk together pumpkin puree, brown sugar, applesauce, maple syrup, and vanilla. Whisk until smooth. Pour wet ingredients into the oat mixture and stir until the oats are evenly coated. They will be moist. Evenly spread the oat mixture onto the prepared baking pan.
Bake for 20 minutes. Remove pan from the oven and stir. Bake an additional 15-20 minutes or until the granola is golden and crisp. remove from the oven and stir in the cranberries and pepitas (or nuts or sunflower seeds). Let cool completely. Store in airtight containers.


Saturday, October 1, 2011

Celebrate October with Pumpkin-Spiced Cream Cheese Cinnamon Rolls!


October is here, and to me October means Crisp Mornings, Colored Leaves, Cups of Hot Apple Cider, and lots and lots of pumpkin-yumminess baking in my kitchen :). Living in South Texas means that I do not get to experience the aforementioned crisp mornings and colored leaves, but I can fill my home with the delightful cinnamony-spiced smells of pumpkin dishes. While I was perusing pinterest recently, I came across this easy and absolutely melt-in-your-mouth-delicious recipe for pumpkin spiced cream cheese cinnamon rolls. The pin is located here: http://pinterest.com/pin/256243937/ and the original recipe can be found here: http://picky-palate.com/2009/10/12/pumpkin-spiced-cream-cheese-breakfast-rolls/
I made them today, and the result was a divine taste of Autumn that would make a great breakfast accompaniment to your hot apple cider or cocoa one crisp Fall morning. Bake some today, and while you savor each bite, let your heart sing Praises to God for this Harvest Season, the Beauty of His creation, and the Blessings in your life. If you are interested in reading about what God has been teaching me regarding "Blessings", then click on over to this link where I was invited to guest post recently.
http://energizerbunniesmommyreports.com/2011/09/blessings-a-featured-fridays-post.html

You are dearly loved and prayed for my friends!

"The LORD will indeed give what is good, and our land will yield its harvest." Psalm 85:12
~~

Pumpkin Spiced Cream Cheese Breakfast Rolls

Ingredients:

2 (8-count cans) of Pillsbury Crescent Rolls (I used the Big & Flaky kind)
4 0z cream cheese, softened
1/4 Cup light brown sugar
1/4 Cup canned pumpkin

1/4 teaspoon ground cinnamon
1/8 teaspoon fresh ground nutmeg

Directions:

Preheat oven to 350 degrees F. On parchment or wax paper, unroll each can of crescent rolls to form 4 rectangles placed side by side. Pinch seams together to form one long rectangle. Place cream cheese, brown sugar, pumpkin, cinnamon and nutmeg into a mixer; beat until well combined. Spread mixture over your two crescent-roll rectangles, leaving a 1/2 inch border around edges. Starting at long end, roll up then cut into 1 inch pieces. Place around 2 9 inch cake pans that have been sprayed with cooking spray. I left the centers open so the rolls form a circle.
Bake for 30 minutes or until rolls are golden brown. Remove and let cool for 10 minutes. Frost warm rolls with cream cheese frosting recipe below.
Frosting:
4 oz softened cream cheese
1/2 Cup powdered sugar
1/2 teaspoon vanilla
1 Tablespoon canned pumpkin


Directions:
Mix all ingredients into a large bowl until smooth. Spread over warm rolls. Serve rolls warm.

Saturday, September 24, 2011

Perfectly Peach Cobbler


My hubby loves fresh peaches. Today, I treated him to an extra special dessert-Perfect Peach Cobbler. If you are a Southern Girl like me then one of the first things you learn how to bake is Cobbler. Both my Grandmothers were Cobbler experts so I learned how to perfect this dish at an early age. My Dad's favorites are blueberry and blackberry, but my hubby prefers his with peaches. Any variety or combination of fruit can be used. This particular cobbler is simple to make and delish to eat. Have a Blessed Weekend my friends, and I pray that you can truly TASTE and SEE that the Lord is Good
~~~
Perfectly Peach Cobbler

Ingredients:


2 lbs Fresh Peaches or 1 Large Can (29 oz) Canned Peaches
¾ cups Sugar, Divided
1 Tablespoon Cornstarch
½ cups Butter, Softened (1 stick)
1 Egg
½ teaspoon Vanilla Extract
¾ cups Flour
¼ teaspoon Baking Powder
1/2 teaspoon Cinnamon


1 dash Salt

Directions:
Preheat the oven to 350° F. Peel and pit the peaches. Slice each into 8 wedges. If using canned peaches, drain the peaches well.

Combine the peaches, ¼ cup of the sugar, and the cornstarch in a large mixing bowl. Let the fruit stand, stirring occasionally, until the sugar dissolves, 5 to 7 minutes.

Make the dough: Cream together the butter and remaining ½ cup sugar in a medium mixing bowl with a wooden spoon or an electric mixer until smooth. Beat in the egg and vanilla until the batter is smooth, scraping down the sides of the bowl once or twice as necessary.

Add the flour, baking powder, cinnamon, and salt and stir until just combined.

Transfer the peaches to an 8-inch square-baking pan. Drop the dough in rounded tablespoonfuls over the fruit.

Bake until the fruit is bubbling and the crust is golden, 50 to 55 minutes. Let the cobbler cool slightly and serve it warm. Top it off with a spoonful of Vanilla Ice Cream or Homemade Whipped Cream.

Friday, September 23, 2011

Guest Posting Today On "Blessings" at Energizer Bunny Mommy Reports

Today I am so blessed to be guest posting at Energizer Bunny Mommy Reports. Click on the link below and discover what God has been teaching me about the "Blessings"in my life. I will also be guest posting there next Friday, and I will be sharing a recipe for some yummy Autumn Pumpkin Chocolate Chip cookies. While you are there, subscribe to the Energizer Bunny Mommy Reports blog. She is a dear friend, has amazing giveaways, and encourages others in Christ through her writing. Blessings to each of you!
http://energizerbunniesmommyreports.com/2011/09/blessings-a-featured-fridays-post.html

Saturday, September 17, 2011

Apple Pie Cupcakes-A Delicious Autumn Treat


Every year my Granddaddy sends us three large mason jars of homemade apple butter. It is so very delicious, and we use it on buttery toast and in peanut butter sandwiches. Today I incorporated it into a super yummy Autumn cupcake. I spooned a teaspoon of the apple butter in the middle of each cupcake and then topped them with my cream cheese frosting and a dusting of cinnamon sugar. For the cupcake, I used my favorite vanilla cupcake recipe, but you could use a boxed mix if that would make life easier :). I bet a spice cake mix would taste incredible.These cupcakes turned out so delicious that my hubby requested that we "not share" them with others :). He declared them one of my best cupcakes ever. No need to worry if you don't have homemade apple butter on hand; feel free to purchase some at the grocery store. I bet these would be amazing with pumpkin butter which I have seen at some of the local gift stores in Fredericksburg, TX.
I hope you enjoy this taste of Autumn my friends. The cupcakes truly taste like mini-apple pies stuffed into a cupcake. Serve some apple cider and share some apple pie cupcakes today with your family or friends after a football game, Autumn hayride, or party. Celebrate God's Bountiful Blessings in your Life!

Psalm 85:12
"Yes, the Lord pours down his blessings. Our land will yield its bountiful harvest."
~~~~~~


Apple Pie Cupcakes


Ingredients:


For the Cake:1 1/2 cups self-rising flour
1 1/4 cups all-purpose flour
1 cup (2 sticks) unsalted butter, softened
2 cups sugar
4 large eggs, at room temperature
1 cup milk
1 teaspoon vanilla extract (I use Mexican Vanilla)

 
Filling:1/2-3/4 cup apple butter


For the Cream Cheese Frosting:1 (8 oz) package of cream cheese
1/2 cup butter (1 stick)
1 box confectioners powdered sugar (aproximately 4 cups)
1 teaspoon vanilla


DIRECTIONS:

Preheat oven to 350 degrees F. Line 2 (1/2 cup-12 capacity) muffin tins with cupcake liners. In a small bowl, combine the flours. Set aside. In a large bowl, on the medium speed of an electric mixer, cream the butter until smooth. Add the sugar gradually and beat until fluffy, about 3 minutes. Add the eggs, 1 at a time, beating well after each addition. Add the dry ingredients in 3 parts, alternating with the milk and vanilla. With each addition, beat until the ingredients are incorporated but do not over beat. Using a rubber spatula, scrape down the batter in the bowl to make sure the ingredients are well blended. Carefully spoon the batter into the cupcake liners, filling them about 1/3 full. Place a tablespoon of apple butter in the center of each cupcake and the top with additional batter to cover it.

Bake for 20 to 25 minutes, or until a cake tester inserted into the center of the cupcake comes out clean. Cool the cupcakes in tins for 15 minutes. Remove from the tins and cool completely on a wire rack before icing. To make the icing, mix the cream cheese and butter until incorporated in a large bowl with your mixer. Add the vanilla. Gradually add the powdered sugar and mix until icing is incorporated.

Top each cooled cupcake with your cream cheese icing and sprinkle the tops with a dusting of cinnamon/sugar mixture. You could also add chopped toasted pecans to the tops if you would like to make them extra special. Next, take a bite of this delicious Autumn treat that tastes like a mini-Apple Pie.

Saturday, September 10, 2011

Glazed Doughnut Muffins

I have been having a blast trying new recipes that I have found on Pinterest. These Glazed Doughnut Muffins turned out great! Their nutmeg and cinnamon flavor and aroma are heavenly. The double-dip glaze on the tops makes them look delectable and makes them taste just like a glazed doughnut. Bake some this weekend and surprise your family with a sweet treat on Sunday morning. Remind them that we can daily "Taste and See that the Lord is Good" (Psalm 34:8).

Blessings to you! You are prayed for daily and loved dearly by the King of Kings and Lord of Lords!

~~~~~~~

Glazed Doughnut Muffins

For the Muffins:
1/4 cup butter
1/4 cup vegetable oil
1/2 cup granulated sugar
1/3 cup brown sugar
2 large eggs
1 1/2 teaspoons baking powder
1/4 teaspoon baking soda
3/4 teaspoon ground nutmeg
1 teaspoon cinnamon
3/4 teaspoon salt
1 teaspoon vanilla extract
2 2/3 cups all-purpose flour
1 cup milk

For the Glaze:
3 tablespoons butter; melted
1 cup confectioners’ sugar; sifted
3/4 teaspoon vanilla
2 tablespoons hot water

Directions:
Preheat oven to 425 degrees F. Line 12 muffin cups with muffin liners or spray with nonstick cooking spray.
In the bowl of a stand mixer fitted with the paddle attachment, beat together butter, vegetable oil, and sugars till smooth. Beat in eggs, one at a time. With the mixer on low speed, baking powder, baking soda, nutmeg, cinnamon, salt and vanilla until just combined. Stir the flour into the butter mixture alternately with the milk, beginning and ending with the flour and making sure everything is thoroughly combined.
Spoon batter into cups, filling the cups, and smooth tops. Divide batter equally among prepared muffin cups. Bake until muffin tops are a pale golden and springy to the touch, 15 to 17 minutes, rotating halfway through baking time. Cool muffins in muffin tin for 5 minutes, then transfer to wire rack and cool 10 minutes before glazing.
To make the glaze, In a medium bowl mix together the melted butter, confectioners’ sugar, vanilla and water. Whisk until smooth.
When muffins have cooled slightly, dip the muffin crown into the glaze and allow the glaze to harden. Once hardened, dip a second time and allow to harden then serve.

Yields: 12 muffins


Note: Muffins will keep at room temperature for about a day.

Monday, August 29, 2011

Pinterest Inspirations become Reality

Headband Holder made from Oatmeal Canister and Scrap Fabric


I love Pinterest. It is my new favorite way to waste time :). If you have never heard of it,then you must check it out. It is basically a way to organize your favorites in one place. You just search the internet for recipes you want to try, home decor you love, fashion that inspires you, quotes that make your heart smile, crafts you long to make, etc... and you "pin" them on your page. People can follow your boards (categories) and "repin" your "pins". It is fabulous! But, I must warn you, it is very, very addictive. But, on a positive note, I have gotten some amazing ideas for cheap craft and home projects, and I have found some fabulous recipes.

After pinning things for several weeks, I finally got around to actually creating some of the things that I pinned. This week, I have made 2 cake stands, a hairband holder for Bella, a noodle race track for my son, a "God Box", and a beautiful menu/love note board for our kitchen. All of these projects were super cheap to make. The cake stand and noodle race track supplies came from the dollar tree. The frame I used for the menu board was 50% off at Hobby Lobby, and the hairband holder supplies were free since I just repurposed an empty oatmeal canister and used fabric and ribbons that I already had. So fun and So frugal!


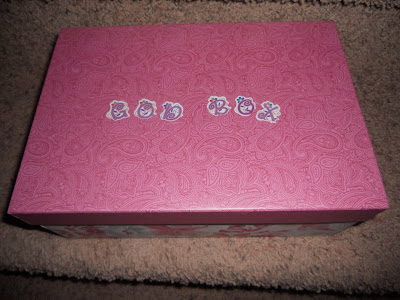
The "God Box" is a box with index cards that we are going to keep in our kitchen. When we are worried or fearful, we will write down our fear or worry on an index card and put it in the box-a physical act of surrendering the burden to God. Each week we will take the cards out and pray over them as a family.

I have plans to make large batches of the pumpkin granola and cinnamon honey butter that I pinned to give as gifts this Autumn to friends, teachers, and family. And, I am totally making the pinned "acorn donut holes" and "ghost nutter butter cookies" for my son's preschool class at Halloween.

I hope you enjoy the pictures below and if you want details on how I made them, then send me an email, leave a comment, or visit my pinterest page for the links to the original projects:
http://pinterest.com/joyouschris/


I pray your day is full of joy, inspiration, and love as you use the talents and passions God has given you to bless others. I will leave you with one of the quotes that I pinned that truly makes my heart smile


"Pool Noodle" Race Track with Marbles


God Box-Actively Surrendering our Worries to God


Cake Stand made from Glass and Plate from the Dollar Tree


Menu Board/Note Board made from a picture frame and scrapbook paper and using dry erase markers.

Friday, August 19, 2011

Buttermilk Spice Muffins...Mimi's Cafe Muffin Makeover

My hubby loves the jumbo Buttermilk Spice Muffins at Mimi's Cafe. However, we rarely go out to eat, so I decided to search for a similar muffin recipe. I found one on the Family Fun website and made a few small changes to it; resulting in an award-winning muffin according to my hubby and friends. My friend even declared them her most favorite muffin I have ever made, and her children gave them an A+++! I baked these in regular size muffin pans, but you could easily make 6 jumbo size ones or 30 mini ones if you like. The recipe said it makes one dozen regular size, but I was able to get 15 out of the batter. If you don't keep buttermilk on hand, you can make your own by mixing 1 Tablespoon of lemon juice OR 1 Tablespoon of white vinegar per 1 cup of regular milk. Stir and let it sit five minutes until you add it to your recipe.

I encourage you to pretend you are at a restaurant this weekend, possibly even Mimi's Cafe, and get your kids involved in helping you measure the ingredients, stir the batter, and insert the muffin liners. Declare them "chefs for the day" and watch how their faces delight and their hearts soar as you spend quality time with them. My four year old loves helping Mommy bake in the kitchen....especially when there is chocolate chips involved ;-).


Have a Blessed Weekend! You are prayed for and loved dearly by your Heavenly Father!


Psalm 127:3
"Children are a gift from the Lord; they are a reward from him."


~~~~~~~

Buttermilk Spice Muffins

Ingredients:
1 cup sugar
1/2 cup butter (1stick), softened
3 large eggs
2 1/2 cups flour
2 teaspoons baking soda
1/2 teaspoon salt
1 teaspoon nutmeg
1 teaspoon cinnamon
3/4 cup + 1 Tablespoon Buttermilk (well-shaken)
1 cup chopped walnuts or pecans

Topping:
1/2 cup sugar
1/2 teaspoon nutmeg
1/2 teaspoon cinnamon

Directions:
Preheat oven to 350 degrees. Line a 12 cup muffin tin with cupcake liners or grease with cooking spray. In a large mixing bowl, cream butter with sugar until light and fluffy. Add eggs and beat until well mixed.

In a separate bowl, whisk together flour, baking soda, salt, and spices. Add half of the dry ingredients to the butter mixture then mix in the buttermilk. Add the remaining flour mixture, beating just until combined. The batter may be lumpy.

Prepare the sugary nut topping. In a small food processor or blender pulse the topping ingredients until the nuts are finely ground and the ingredients well-mixed. If you prefer large nut pieces, then just mix your ingredients in a bowl - this is how I do it. I think the muffin has a more bakery-style look when you leave the nuts in larger pieces.

Spoon batter into prepared muffin tins, filling each 3/4 way full. Sprinkle the top with a large tablespoon of the sugary nut topping. Bake for 20 minutes, or until a toothpick inserted in the middle of the muffin comes out clean. Be careful not to over-bake or the muffins will be too dry. Cool in the muffin tin for five minutes and then move to a cooling rack. Enjoy warm with a cup of coffee or hot tea :-).


Saturday, August 13, 2011

Upside Down Caramel Apple Coffee Cake & My Cutie Pie


Sorry for the big break in blogging but I have been a bit busy enjoying our precious baby girl, Bella Joy, who was born in early July. She is a true delight and has already brought us so much joy! We are rejoicing in God's beautiful blessing!

I have finally returned to baking, and today I made this delish and super easy coffee cake from the new Gooseberry Patch cookbook, Quick & Easy Autumn. As previously mentioned in older posts, I love Gooseberry cookbooks. If you are looking for a quick and yummy breakfast treat that gives you a glimpse of Autumn, then this recipe is for you. I am so ready for Fall....cooler temps, yummy pumpkin and apple treats, and the beautiful colors of Autumn. Here in TX, the temperatures have been 106 and higher so Fall can't get here soon enough! Enjoy the recipe and remember that you are dearly loved and prayed for!

Psalm 86:15
"But you, Lord, are a compassionate and gracious God, slow to anger, abounding in love and faithfulness."


Upside Down Caramel Apple Coffee Cake
Ingredients:

1 1/2 cups apples, peeled, cored, chopped, and divided
12.4 oz tube refrigerated cinnamon rolls, separated
1/2 cup pecan pieces
2 Tablespoons butter, melted
1/3 cup brown sugar, packed
2 Tablespoons corn syrup

Directions:
Spread one cup of apples in a 9" glass pie plate sprayed with non-stick vegetable spray. Cut cinnamon rolls into quarters, setting aside icing from tube. Place rolls in a large bowl; add remaining apples and pecans. In a small bowl, combine remaining ingredients; mix well and pour over rolls. Toss gently to combine. Spoon mixture over apples in pan. Bake, uncovered, at 350 degrees for 25 to 35 minutes, until rolls are deep golden. Cool for 5 minutes; invert onto a serving platter. Remove lid from icing and microwave for 10 to 15 seconds. Drizzle icing over warm coffee cake. Makes 8 servings.

Monday, July 4, 2011

Paula Deen's Blackberry Pie

Happy Fourth of July! We truly have so much to be thankful for in America, andth thing I am most thankful for is the freedom I have to worship and serve our Awesome God. Christ came to set us free...what an AMAZING Blessing!
"So Christ has truly set us free. Now make sure that you stay free, and don’t get tied up again in slavery to the law." Galatians 5:1

One of my favorite Cooking Magazines is the Food Network Magazine. It truly has great, easy to make recipes and the pictures it includes are amazing. This weekend, for July 4th, I made Paula Deen's Lattice-Top Blackberry Pie which was included in the most-recent issue of the magazine. However, instead of making a lattice on the top crust, I cut out a heart from the middle of the top crust. Blackberries are in season now, and you can find yummy fresh berries for great prices at your local grocery store or your farmers market. Enjoy this pie hot out of the oven with a scoop of vanilla ice cream. It is the perfect Summer Treat :)!

You are Prayed for and Dearly Loved my friends!


Paula Deen's Lattice-Top Blackberry Pie

Ingredients:

6 cups (1 3/4 pounds) fresh blackberries

1 cup sugar

3 tablespoons cornstarch

1 teaspoon lemon juice

1/2 teaspoon lemon zest

2 disks refrigerated pie dough

(one 14 ounce package-Pillsbury brand)

(or you can use your own homemade pie dough)

1 large egg

Directions:

1. Preheat the oven to 400 degrees witha baking sheet on the middle rack. In a large bowl, toss the blackberries, sugar, cornstarch, lemon juice, and lemon zest. Let stand, mixing and coarsely mashing occasionally for about 20 minutes.

2. Fit one round of dough into a 9 inch deep dish pie plate. Trim the edges, leaving a 1/2 inch overhang. Refrigerate while you continue. Cut the remaining piece of dough into approximately eleven 1 1/4 inch wide strips. (Or, if you chose to use the entire piece of dough like I did for my pie, cut a shape with a cookie cutter out of the middle of your pie dough disk).


3. Spoon the blackberry mixture into the pie shell. Dot the top with the butter. Arrange the dough strips in a lattice pattern on top of the filling and trim the strips close to the edge of the pan; roll up and crimp the edge. (Or if you are using the method I chose, lay your disk of pie dough on top of the pie, crimping the edges and cutting off any excess). Lightly beat the egg with 1 tablespoon water and brush on the top and edge of the pie.

4. Place the pie on the hot baking sheet in the oven and bake until the filling is bubbling, about 45-60 minutes. If the crust browns too quickly, cover it with foil and continue baking. Let the pie cool before serving. Enjoy!


Saturday, June 18, 2011

White Chocolate Blackberry Streusel Bars


Where we live in South Texas, produce is very cheap, especially during the summer months. I recently got blackberries for 88 cents a package and decided to try this recipe I found from the Tasty Kitchen Blog (their recipe called for making strawberry streusel bars). I altered it a little to accomodate the blackberries, and the end result was fabulous! This is a great recipe to use for a picnic, bbq, or summer party as it utilizes fresh fruit, and once it is sliced into bars it is easy to transport. You could use any variety of berry and jam that you like. I am sure blueberries, raspberries, and strawberries would taste wonderful as well.

Have a Blessed and Beautiful Father's Day Weekend! You are prayed for daily and dearly loved by your Heavenly Father.

"Surely your goodness and unfailing love will pursue me
all the days of my life, and I will live in the house of the Lord
forever." Psalm 23:6

~~~~~~~~~~~~~~~~~~~~~~~~~~~~~

White Chocolate Blackberry Streusel Bars
Ingredients:
2 cups Old Fashioned Oats
1-½ cup All-purpose Flour
¾ cups White Sugar
¾ cups Light Brown Sugar
1 teaspoon Baking Powder
½ teaspoons Baking Soda
½ teaspoons Salt
1 cup Cold Butter, Cut Into Small Pieces (2 sticks)
8 ounces, Blackberry Jam (1 cup)
1 teaspoon Lemon Zest
2 cups Blackberries, Flattened and Smashed with a Fork
1/2 cup white chocolate chips

Directions:
1. Preheat oven to 350 degrees F. In a large mixing bowl, whisk together the oats, flour, both sugars, baking powder, baking soda and salt.
2. Add the chopped up cold butter and work it into the dry ingredients with your fingers, a fork, or a pastry blender until the mixture looks like small crumbles. Reserve 1 1/2 cups of this mixture.
3. Dump the remaining crumb mixture into an ungreased 9x13 inch pan and press it into an even and thick crust.
4. Bake in 350 degree oven for 12-14 minutes or until it is firm to touch. Do not brown.
5. Remove pan from oven. Warm the blackberry jam in the microwave for 30 seconds and then stir in the lemon zest. Drizzle the warm jam over the warm crust and spread with a spatula. Spread the smooshed blackberries over the crust. Sprinkle on the reserved cup and a half of crumb mixture.
6. Return pan to 350 degree F oven and bake for another 20-25 minutes or until the crumbs on top are lightly browned. Then remove it from the oven and let the pan cool for 1 hour.
7. Melt the white chocolate in microwave at 20 second intervals until fully melted, making sure to use a microwaveable safe dish. Drizzle melted white chocolate c over the streusel top. Cut into bars. ENJOY!


Makes 15-18 bars (dependent upon the size of the bars you slice)

Friday, June 17, 2011

Monkey Muffins-A Yummy Breakfast Treat for Kids of All Ages

I absolutely love Taste Of Home Magazine. It has some of the best, easiest, and healthiest recipes in it. I subscribe to their weekly emails as well, and this week they sent out a printable Taste of Home Kids Coloring Cookbook that you can download. Since my four year old loves helping me bake and cook, I was super excited to receive this and immediately printed it out. Yesterday, we made the Monkey Muffins, and they were a HUGE hit. Seriously, these will likely become a staple in our house. I love that the recipe calls for healthy ingredients like bananas and peanut butter in a yummy treat that kids will love. My son has eaten several already (for breakfast and for snack). So, if you happen to have some overripe bananas, bake up a batch of these this weekend and let your kiddos join in the fun. If you would like to download the Kids Coloring Cookbook, just go here: http://www.tasteofhome.com/Kids-Coloring-Cookbook?pmcode=ILFKA07T&_mid=2044764&_rid=2044764.854200.38599
We can't wait to try the rest of the recipes. We plan to make the Pretzel Sparklers and Fourth of July Pizza very soon.

Note: The original recipe calls for making mini muffins, but I used regular sized muffin pans which yielded 24 muffins instead of the 72 mini muffins.


Happy Father's Day to all of the Amazing Dads out there! I am so blessed to have an Awesome Dad who loves me unconditionally and sacrifice so much for me. I also am blessed to be married to an Amazing Father to our children. My husband has a deep and evident love for our son and soon-to-arrive daughter. I thank God for these blessings!


Have a Beautiful Weekend. You are prayed for and loved immensely by your Heavenly Father.

“Sing to God, sing in praise of his name, extol him who rides on the clouds; rejoice before him—his name is the LORD. A father to the fatherless, a defender of widows, is God in his holy dwelling.”

Psalm 68:4-5 NIV

~~~~~~~~~~~~~~~~~~~~


Monkey Muffins


Ingredients:


1/2 cup butter, softened


1 cup plus 1 tablespoon sugar, divided


2 eggs (or 1/2 cup egg beaters)


1 cup mashed overripe banana (about 2-3 bananas)


2/3 cup peanut butter


1 tablespoon skim milk


1 teaspoon vanilla extract


2 cups all-purpose flour


1 teaspoon baking soda


1/2 teaspoon salt


3/4 cup minature semisweet chocolate chips


Directions:


In a large bowl, cream butter and 1 cup sugar until light and fluffy.
Add eggs, one at a time, beating well after each addition. Beat in the mashed
bananas, peanut butter, milk and vanilla. Combine the flour, baking soda
and salt; add to creamed mixture just until moistened. Fold in chocolate chips.
Fill greased or paper-lined miniature muffin cups three-fourths full.
Sprinkle with remaining sugar. Bake at 350° for 14-16 minutes or until a
toothpick inserted near the center comes out clean. Cool for 5 minutes
before removing from pans to wire racks. Makes 72 mini muffins or 24 regular-sized muffins.

Saturday, June 11, 2011

Dancing the sacred dance of joy and grief simultaneously...and yet "NEVER ONCE" have we been left alone!


"But if the grieving begins to linger too long, it can be good to circle around to the gifts again; to whisper thanks, to receive the blessing, and to turn ourselves outward. Grief closes us in. Gifts spin us around to thankful, and thankful opens us wide for the giving." (Emily from chattingatthesky.com)

As Bella Joy's Pregnancy draws to a close, I am finding myself often overcome with so many conflicting emotions-sheer joy and hope and bliss at meeting my baby girl, holding her close, and whispering my love to her while at the same time I ache with an unexplainable sorrow and yearning for our Savannah Grace who is dancing with Jesus now. I find myself dancing as well...the dance of joy and grief in these final days of pregnancy. On the days when my heart is overwhelmed, I am choosing to whisper my gratitude and receive God's blessing-our Bella JOY, trusting Him to hold Savannah Grace close to His heart. One thing I have learned since Savannah's death, is that God has NEVER left us and NEVER stopped loving us...He has remained in control; He has NEVER left His throne-He has remained FAITHFUL. I love Matt Redman's new song, "Never Once"...especially the line, "Every step, we are breathing in your grace." We never walk alone! What a promise to cling to in days of grief, and in days of joy!

Please pray for us in these final weeks that our hearts would be comforted with the HOPE and PROMISE that we will see our first daughter, Savannah Grace, very soon-we have the promise of Heaven and the Promise of Christ's return. Pray that we can focus on the BEAUTY that our God has brought out of the ashes and the JOY that is coming in the Morning for our family. Bella Joy is truly a miracle (http://butterflykissesntastydishes.blogspot.com/2011/01/god-said-yes-even-when-i-didnt-have.html) and we are praising God for His AMAZING LOVE and the ways in which He is healing our hearts.

You can listen to the "yet-to-be-released" Never Once song on Matt Redman's facebook page: https://www.facebook.com/pages/Matt-Redman/44470964227?v=app_178091127385&sk=app_178091127385


Never Once by Matt Redman

Verse 1

Standing on this mountaintop

Looking just how far we've come

Knowing that for every step

You were with us


Verse 2

Kneeling on this battle ground

Seeing just how much You've done

Knowing every victory

Is Your power in us


Pre-Chorus

Scars and struggles on the way

But with joy our hearts can say

Yes, our hearts can say


Chorus 1

Never once did we ever walk alone

Never once did You leave us on our own

You are faithful, God, You are faithful


Repeat Verse 2

Repeat Pre-Chorus


Chorus 2

Never once did we ever walk alone

Never once did You leave us on our own

You are faithful, God, You are faithful

You are faithful, God, You are faithful


Bridge

Scars and struggles on the way

But with joy our hearts can say

Never once did we ever walk alone

Carried by Your constant grace

Held within Your perfect peace

Never once, no, we never walk alone


Ending Chorus

Never once did we ever walk alone

Never once did You leave us on our own

You are faithful, God, You are faithful


Every step we are breathing in Your grace

Evermore we'll be breathing out Your praise

You are faithful, God, You are faithful

You are faithful, God, You are faithful


Crumb Cake that says "Bon Appetit!"


I found this amazing recipe in Bon Appetit Magazine...a magazine that traditionally scares me because of the complexity of the recipes. However, I decided to bravely try this breakfast goodie, and the tediousness of it was well worth the effort. It is described as "a tender sour cream coffee cake that is topped with a thick layer of cinnamon-scented streusel." It made my kitchen smell heavenly and the end result was beautiful, delicious, and even "gourmet". So, if you have an hour a half to spare and you enjoy making amazing breakfast treats, then give this recipe a try. I promise you won't be disappointed. I can't wait to share ours with our Sunday School class in the morning.

Blessings and Love to you my dear friends. Your Heavenly Father loves you dearly!

Psalm 34:8

"Taste and See that the Lord is Good, blessed is the one who takes refuge in Him!"
~~~~

New York-Style Crumb Cake


Ingredients:
Topping Ingredients:
1 cup (packed) dark brown sugar
1/2 cup sugar
1 1/2 tablespoons ground cinnamon
1/2 teaspoon salt
1 cup (2 sticks) unsalted butter, melted, warm
2 1/2 cups all purpose flour
Cake Ingredients:
2 1/2 cups all purpose flour
1 teaspoon baking soda
3/4 teaspoon baking powder
1/2 teaspoon salt
3/4 cup (1 1/2 sticks) unsalted butter, room temperature
1 1/2 cups sugar
2 large eggs
1 1/3 cups sour cream
1 teaspoon vanilla extract


Directions:
Topping:
Mix both sugars, cinnamon, and salt in medium bowl and whisk to blend. Add warm melted butter and stir to blend. Add flour and toss with fork until moist clumps form (topping mixture will look slightly wet). Set aside.
Cake:
Position rack in center of oven and preheat to 350°F. Butter or spray with cooking spray a 13x9x2-inch glass or metal baking dish. Sift flour, baking soda, baking powder, and salt into medium bowl. Using electric mixer, beat room-temperature butter in large bowl until smooth. Add sugar and beat until light and fluffy. Add eggs 1 at a time, beating until well blended after each addition. Add sour cream and vanilla extract and beat just until blended. Add flour mixture in 3 additions, beating just until incorporated after each addition. Transfer cake batter to prepared baking dish; spread batter evenly with rubber spatula. Squeeze small handfuls of topping together to form small clumps. Drop topping clumps evenly over cake batter, covering completely (topping will be thick).
Bake cake until tester inserted into center comes out clean and topping is deep golden brown and slightly crisp, about 1 hour. Cool cake in dish on rack at least 30 minutes.


DO AHEAD Can be made 1 day ahead. Cool completely. Cover and let stand at room temperature. Cut cake into squares and serve slightly warm or at room temperature.
Serves 15-18

Friday, June 3, 2011

Pecan Chewies (a.k.a Portable Pecan Pie :))


My hubby loves Pecan Pie, and this simple, yummy recipe allows him to have a "slice of pie" in his lunch bag each work day. These bars are portable and taste just like the Pecan Pie loved by so many. They are especially good served warm with a scoop of vanilla ice cream drizzled with caramel. However, they taste great at room temperature as well. Bake a batch this weekend and I guarantee your family will thank you. Blessings to you my dear friends! You are dearly loved by your Heavenly Father!

1 John 3:1
"See what great love the Father has lavished on us, that we should be called children of God! And that is what we are!"

Pecan Chewies


Ingredients:
2 sticks butter
1 cup granulated sugar
1 cup light brown sugar, firmly packed
2 eggs, well beaten
2 cups self-rising flour
1 1/2 cup pecans
2 tsp vanilla extract

Directions:
Preheat the oven to 300 degrees. Melt butter, add brown and white sugars, and blend well by hand (no mixer). Add beaten eggs, stir well. Add flour and stir until all lumps are gone. Add pecans and vanilla. Pour and spread into a greased and floured 9 x 13 baking dish. Bake approximately 50 minutes being cautious not to over cook. Enjoy!

Saturday, May 21, 2011

Strawberry White Chocolate Muffins-Simply Scrumptious!


Today, I made some yummy Strawberry White Chocolate Muffins with delicious strawberries that were super cheap at the grocery store. I love summer-time when berries are often on sale for less than $1.50 a package. Berries are by far my favorite food-so sweet and so very good for you to eat. You could easily substitute any berry for the strawberries. I am sure raspberries, blueberries, or blackberries would taste just as great in this easy muffin recipe. So, in honor of Summer's fast approach, make some of these delightful treats for your family.

Have a Beautiful week my Beautiful Readers! You are loved dearly by your Heavenly Father! May your lives be a sweet fragrance to God!


Strawberry White Chocolate Muffins

Ingredients:
1 egg
2 cups Original Bisquick mix
2/3 cup milk
1/2 cup white baking chips
1/3 cup sugar
2 tablespoons vegetable oil
1 cup strawberries

Sugar for dusting on top of muffins


Directions:
1.Heat oven to 400°F. Grease bottoms only of 12 regular-size muffin cups, or place paper baking cup in each muffin cup.
2.Beat egg slightly in medium bowl. Stir in remaining ingredients except raspberries just until moistened. Gently stir in strawberries. Divide batter evenly among cups.
3.Bake 15 to 18 minutes or until golden brown. Cool 5 minutes; remove from pan.
Makes 12 muffins
I sprinkled mine with sugar before baking to make them extra sweet :).

Thursday, May 19, 2011

Banana Cream Pie in a Bowl-the Perfect Memorial Day Dessert

We are having some dear friends and their children over for dinner tomorrow night for a simple meal of hamburgers and hot dogs on the grill, french fries, watermelon, and yummy desserts. I wanted to make something light and yummy that would be loved by kiddos and adults. I found this recipe for BANANA CREAM PIE IN A BOWL in one of my Betty Crocker Cookbooks, and I was so pleased with the way it turned out. It was super-easy to make, and the layers look so pretty in the glass bowl. I cannot wait to taste it tomorrow. This would be the perfect dessert to take to your upcoming Memorial Day Picnic or BBQ. It is sure to be loved by kids of all ages :).

Have a truly blessed week my friends and remember that you are dearly loved by your Heavenly Father!!

"Let the morning bring me word of your unfailing love, for I have put my trust in you. Show me the way I should go, for to you I entrust my life."
Psalm 143:8


Banana Cream Pie in a Bowl

Ingredients:

1 cup all-purpose flour
1/4 cup packed brown sugar
1/2 cup firm butter or margarine (1 stick)
1/2 cup peanuts
1 box (4-serving size) banana instant pudding and pie filling mix
2 cups cold milk
3 ripe medium bananas, sliced (I used 6 bananas)
1 container (8 oz) frozen whipped topping, thawed (I used two containers)

Caramel Syrup Topping (optional)

Directions:
Heat oven to 400°F. In medium bowl, mix flour and brown sugar. Cut in butter, using pastry blender, until mixture is crumbly. Stir in peanuts. Press evenly on bottom of ungreased 9-inch square pan. Bake about 15 minutes or until light brown. Stir to break up. Cool completely, about 1 hour.

In large bowl, make pudding mix as directed on box, using 2 cups milk. In 2-quart serving bowl, layer half of the crumb mixture, pudding, whipped topping, and bananas; repeat layers. I added a circle of whipped topping in the center, sprinkled some crumb mixture on top and drizzled the whole thing with caramel syrup to make it extra special and delish! Cover and refrigerate at least 4 hours. Top with additional peanuts if desired. Store in refrigerator.

Note: This recipe serves 6 but could easily be doubled if you expect a big crowd. Just make sure to use a very large glass bowl :).

Tuesday, May 10, 2011

Peanut Butter-Ribboned Banana Bread

Today I experimented with a Banana Bread Recipe and some Peanut Butter Morsel Chips that I had in my pantry. The end result was a delicious, hearty sweet bread that would be the perfect breakfast or after-school snack when slathered with peanut butter or honey. I encourage you to make a loaf and treat your kiddos in these final weeks before Summer break begins. This delicous treat is sure to bring a smile to their faces and their tummies.

My sweet four year old truly brought a smile to my face and heart this morning. I have to share this sweet moment with you. I woke up to Jaythan singing "God is bigger than the boogy man, He's bigger than Gozilla and the monsters on t.v...." Then, when I came out to the living room, he brought me his Veggie Tales Bible and asked me to read to him from Genesis 10 because "today is number 10 on the calendar and we need a Bible story." So, I started a bit ahead and read to him the story of creation to which he asked many questions and seemed truly interested and engaged. It was a special memory that I will treasure always. In fact, I would love to start a tradition of reading to him from the Bible each morning...a time when we can share and grown together. This morning through my son I received a Beautiful reminder that we must start our day singing praises and reading God's Word!


May your day be filled with a new realization of God's love for you, a greater desire to spend time with Him studying His Word, and a heart full of praise to Him for His blessings in your life. You are prayed for daily and loved dearly!

"They were also to stand every morning to thank and praise the LORD. They were to do the same in the evening" 1 Chronicles 23:30


Peanut Butter-Ribboned Banana Bread

Ingredients:
•½ cups Peanut Butter Chips (I used Reeses brand)
•¼ cups Butter, At Room Temperature
•½ cups Granulated Sugar
•2 whole Large Eggs
•1 cup Mashed Bananas, About 2-3 Medium (overripe bananas work best)
•⅓ cups Buttermilk
•1 teaspoon Vanilla Extract
•2 cups All-purpose Flour
•1 teaspoon Baking Powder
•½ teaspoons Salt
•⅛ teaspoons Baking Soda

Directions:
1. Melt the peanut butter chips in a small bowl in the microwave (30-45 seconds), stir. Set aside and let cool to room temperature.

2. Preheat oven to 350 degrees F. Spray a large nonstick loaf pan (9 x 5) with cooking spray. Dust with flour.

3. In a large bowl, beat the softened butter with the sugar with an electric mixer until crumbly. Add in eggs, one a time, beating well after each addition. Mix in mashed banana, buttermilk, and vanilla extract.

4. In a small bowl, combine flour, baking powder, salt and baking soda. Mix to combine.

5. Add dry ingredients to wet ingredients and mix until just combined. Remove 1 cup of batter to the small bowl with the melted peanut butter chips. Mix well with a wooden spoon or hand mixer.

6. Pour half of the banana bread batter on the bottom of the loaf pan. Pour the peanut butter batter over the banana bread batter. Spread evenly. Top with the rest of the banana bread batter and smooth the top. Run a knife up and down through the batter to create a swirl effect.

7. Bake at 350 degrees F for 45-55 minutes or until a toothpick inserted into the center comes out clean. Cool in pan on a wire rack for 15 minutes, then remove to the wire rack to cool completely. Slice into 16 pieces. Serve warm slathered in honey or peanut butter. Enjoy with a glass of cold milk.

Tuesday, April 26, 2011

Oreo-Stuffed Chocolate Chip Cookies


Oreo-Stuffed Chocolate Chip Cookies-do I have your attention??? Those words sound just Heavenly, don't they?? I am not sure where I found this recipe, but it was in my pile of printed-out-goodness that I keep handy when I am in the mood to try something new and yummy. Today, we were in the mood for something that involved oreos, and this recipe totally fit the bill. These were easy to make and a great recipe to get your kiddos involved in the baking. Just have them put the oreos in the middle of the cookie dough. My son loved helping, and he especially loved sneaking a few stray oreos :). These cookies are best served straight out of the oven with an ice-cold glass of milk. Delish!!!

Have a blessed day, my friends, and remember that you are dearly loved by your Heavenly Father!!


Oreo-Stuffed Chocolate Chip Cookies

Ingredients:
•2 sticks butter, softened
•3/4 cup packed brown sugar
•1 cup white sugar
•2 large eggs
•1 tablespoon vanilla extract
•3 1/2 cups all-purpose flour
•1 teaspoon salt
•1 teaspoon baking soda
•10 ounces semi-sweet chocolate chips
•1 package Oreo cookies – I used mini oreos to make smaller cookies, but you could use regular or double-stuffed oreos to make super large cookies

Directions:
Preheat oven to 350 degrees.

In the bowl of a stand mixer, cream together the butter and sugars. Add in the eggs and vanilla and mix until well combined. If you do not have a stand mixer, use a large bowl and a hand mixer.

In a separate bowl, mix the flour, baking soda, and salt. Slowly add to the wet mixture and combine thoroughly. Stir in the chocolate chips.

Chill the dough for 15 minutes to make it easier to work with and to keep the dough from spreading when baking.

Using a cookie scoop place one scoop of dough on top of an Oreo cookie. Place another single scoop on the bottom of the Oreo to create a cookie sandwich. Seal the edges together to completely close in the Oreo. (NOTE: I made smaller cookies with mini oreos-I just placed one small scoop of cookie dough on the parchment-paper lined cookie sheet; my son placed a mini oreo in the center of each cookie; and then I topped the cookie with another scoop of dough and sealed the edges with my fingers-this process worked great!)

Place the balls of cookie dough on a parchment-paper lined baking sheet and bake for 9-13 minutes. Let cool for 5 minutes and then transfer to a wire rack.

Sunday, April 24, 2011

"Eucharisteo" Oil Painting Adoption Auction-Auction ends on May 8, 2011


We recently were blessed with a BEAUTIFUL gift from our dear friends, Jacob and Cyndi Morales. Jacob painted a GORGEOUS oil painting for us to auction off to raise money for Emma' adoption. This painting has been prayed over and devoted to our Lord, and it is our prayer that whoever wins the auction receives a blessing from the beauty that Jacob captured as he used the talent that God has blessed him with.

Visit http://emmacharity.blogspot.com/2011/04/eucharisteo-oil-painting-auction.html


and make your bid on this GORGEOUS piece of Artwork. All Proceeds go towards our Adoption. The Auction will close on Sunday, May 8, 2011 at Midnight.

Please pass this link along to your friends whom you think may be interested. The more bidders the better :).
May God Bless each of you!
Much Love,
Darin, Christina, Jaythan, Bella, and Emma

Wednesday, April 13, 2011

White Chocolate Jelly Bean Bark-the Perfect Preschool Easter Treat


Next week, my son's four year old class is having an Easter Party, and I am responsible for bringing the "sweet" treat. I was told it is better not to bring cupcakes because they are too filling, too messy, and too full of sugar (the children will have lots of other snacks to enjoy as well). At first, I was super disappointed because cupcakes are my speciality. I have the cutest Easter cupcake with shredded toasted coconut, Peeps chickens, and Whoppers Easter eggs. But, I recovered quickly from the cupcake creation letdown when I came across this fun and easy recipe for "White Chocolate Jelly Bean Bark".


I decided to do a trial-run of the recipe this week prior to making several batches for his party next Wednesday. It was a huge success! This turned out to be such a pretty, Springy, simply delicious, and insanely easy-to-make treat. I used Starburst Jelly Beans because they are by far the BEST! Seriously, I could eat an entire bag of the in one sitting. So, if you are looking for a different kind of Easter Goodie to make for your children, then try this recipe. This Jelly Bean Bark would be such a fun gift to give to your childrens' teachers packaged in a cute Easter cellophane bag and tied with pastel-colored ribbon. You can find packages of holiday-themed cellophane bags at the Dollar Tree.


Have a Blessed, Joy-Filled Day!! You are prayed for daily and loved Immensely by your Heavenly Father!!


“Why are you looking among the dead for someone who is alive? He isn’t here! He is risen from the dead! Remember what he told you back in Galilee, that the Son of Man must be betrayed into the hands of sinful men and be crucified, and that he would rise again on the third day." Luke 24:5-7


White Chocolate Jelly Bean Bark


Ingredients:

2 cups (12-oz. pkg.) White Chocolate Chips

2 teaspoons vegetable shortening (I use Crisco Sticks)

1/2 cup Starburst Jelly Beans, divided (or your favorite Jelly Bean brand)


Directions:

LINE baking sheet with wax paper.

MICROWAVE chocolate chips and vegetable shortening in medium, uncovered, microwave-safe bowl on MEDIUM-HIGH (70%) power for 1 minute;

STIR. Morsels may retain some of their original shape. If necessary, microwave at additional 10- to 15-second intervals, stirring just until morsels are melted. Stir in 1/4 cup of the Jelly Beans.

SPREAD mixture to 1/4-inch thickness on prepared baking sheet. Sprinkle with remaining 1/4 cup of Jelly Beans. Refrigerate or Freeze for about 15 minutes or until firm. Break into pieces. Store in airtight container at room temperature (I store mine in the refrigerator because I think it tastes better cold).

Saturday, April 2, 2011

Granny's Watergate/Pistachio Cake


A dear friend of mine saw Pioneer Woman's recipe for Pistachio Cake and posted on facebook that she would love to taste it one day. You can find her original recipe here: http://thepioneerwoman.com/cooking/2011/01/pistachio-cake/

The very first cake that I learned how to make was my Granny's Pistachio Cake, which she always called, "Watergate Cake". I am not sure where the name came from, but I always thought it was a cool name for a yummy green cake. I had totally forgotten about that recipe, so today, I pulled it out, compared it to the one posted by Pioneer Woman and got to baking. I can't wait to suprise my friend tomorrow at church with her very own Pistachio Cake. Since my friend referenced the Pioneer Woman's recipe, that is the one I made for her. But, I fully intend to make my Granny's Version later this week. Granny has never been a fan of chocolate, so I can imagine that she would stick with her own recipe :).


This really is one of the easiest cakes ever to make, so I encourage you to get your kids involved. They will love that the cake is green and has chocolate ribbons inside :). My Granny's cake doesn't have chocolate in it like the Pioneer Woman's does, so I will post both recipes and you can choose which one fits your tastes the best.


I am including a picture of my beautiful Granny-she taught me so much and continues to bless me with her laughter and smiles.


Have a beautiful weekend my dear friends. You are prayed over and loved dearly by your Heavenly Father!


Granny's Pistachio Cake

Ingredients:

1 box White Cake Mix

1 package (4 ounce) Pistachio Instant Pudding Mix

3 eggs

1 cup Canola Oil

1 cup 7-up or Ginger Ale Soda


FROSTING Ingredients:

2 envelopes Dream Whip

1 instant Pistachio Pudding

1 1/2 cups Milk

Directions:

Mix all 5 ingredients in medium bowl for two minutes. Pour into a tube/bundt pan and bake at 350 degrees for 40-45 minutes. After cake has coooled, make frosting by mixing all frosting ingredients together with a hand mixer. Spread all over the cake and enjoy!

~~~~~~~~~~~~~~~~~~

Pioneer Woman’s Pistachio Cake

Ingredients:

1 box White Cake Mix

1 package (4 Ounce) Pistachio Instant Pudding Mix

½ cups Orange Juice

½ cups Water

½ cups Vegetable Oil

4 whole Eggs

¾ cups Chocolate Syrup (such As Hershey's)

Directions:

Preheat oven to 350 degrees. Grease and flour bundt pan. Mix all ingredients but chocolate syrup and beat for two minutes on medium-high. Pour 3/4 of the batter into the bundt pan. Add chocolate syrup to the remaining batter and mix well. Pour chocolate-laced batter on top of the pistachio batter. Bake for 1 hour at 350 degrees. Note: You can use a knife to swirl chocolate batter into the pistachio batter for more of a marbled design. Variation: Coat cake with chocolate ganache!