Thursday, February 24, 2011

Chocolate Zucchini Bread & Pregnancy Makeover Voting


Two things I love right now...Being Pregnant and Baking! I am currently five months along with a beautiful baby girl. Now that I am in the second trimester I am feeling so much better and baking so much more. At a recent playdate, one of my close friends reminded me of the zucchini bread that I made for her family over a year ago. She said that her son loved it and she loved that he was getting veggies in his tummy :). So, I pulled out my recipe for Chocolate Zucchini Bread and make a double batch-with plenty to enjoy and some to share with my friends.

To shred the zucchini, I peeled and chopped up one zucchini in small pieces and then stuck the pieces in my mini chopster and let it do the "shredding" work for me. So easy! The zucchini can not be seen or tasted so you will definitly "succeed" in sneaking the veggies in your child's dessert :). I hope you enjoy the recipe! It is super yummy-loved by adults and kiddos!

After you stick your loaves in the oven, would you do me a favor and click over to this website:
http://themonitor.upickem.net/engine/Details.aspx?p=V&c=25937&s=6856121&i=1 and click on the vote tab above my picture an story. Our local paper is sponsoring a Mommy Makeover Contest for moms who are pregnant now. You can vote once per hour. I would love to win the spa day package that they are giving away. Thanks so much!! Feel free to spread the word to everyone you know. Voting ends March 15th.

God Bless you my Friends! You are prayed for and loved dearly by your Heavenly Father!!


Psalm 127:4
"One thing I ask from the LORD, this only do I seek: that I may dwell in the house of the LORD
all the days of my life, to gaze on the beauty of the LORD and to seek him in his temple."


Chocolate Zucchini Bread


Ingredients:


2 1/2 cups all-purpose flour


1/4 cup unsweetened cocoa powder


2 teaspoons baking soda


1/4 teaspoon ground cinnamon


1/2 teaspoon ground cloves


1/4 teaspoon salt


1 cup packed light brown sugar


1/2 cup granulated sugar


1/2 cup (1 stick) unsalted butter, cut into pieces, at room temperature


1/2 cup canola oil


3 eggs


1 1/4 teaspoons vanilla extract


1/2 cup buttermilk


3 cups grated zucchini (about 1 medium zucchini)


Directions:


Preheat the oven to 350 degrees F. Spray or grease 2 (9x5) inch loaf pans. In a medium bowl, whisk together the flour, cocoa, baking soda, cinnamon, cloves, and salt. Set aside.


In a large bowl, using a mixer, cream the brown sugar, granulated sugar, butter, and oil until light, about 2 minutes. Mix in the eggs one at a time, blending well after each addition. Beat in the vanilla and buttermilk. Mix in the flour mixture, then stir in the zucchini.


Spoon the batter into the prepared pan. Bake in the center of the oven for 45-55 minutes, or until a toothpick or cake tester inserted into the center of the loaf comes out dry.


Cool in the pan for 5 minutes, then invert the bread onto a wire rack and turn right side up to cool completely. Enjoy!!!

Monday, February 21, 2011

Toasted Almond & Cashew Granola


I recently came across an Almond Granola recipe on Joy the Baker's website and decided to tweak it a little. She initially tweaked it from Martha Stewart's website so I figured I was allowed to do a little creative expression myself :). I used a mixture of cashews and almonds, but you could try any of your favorite nuts and I am sure that it would turn out great. I also adjusted the spices and used canola oil instead of vegetable oil. If you would prefer using Joy's recipe, you can find it here: (http://www.joythebaker.com/blog/2011/01/toasted-almond-granola/),


I made a huge batch of my version of the granola recently and packaged it in cute little Valentine Sealable containers. I sold the containers at a local craft fair for $5 apiece to raise money for our adoption. The Granola was loved by the attendees so much that I have already had repeat customers! It is very easy to make and would make a great breakfast cereal or as a topping to a yogurt parfait. You could even put some on top of ice cream to make your dessert semi-healthy or use it as a tasty trail mix :). Enjoy!

You are Prayed for my friends!!

Psalm 147:11
"The LORD delights in those who fear him, who put their hope in his unfailing love. "


Toasted Almond Cashew Granola
Makes: 8 cups
(Adapted from joy the baker who adapted from martha stewart :))

Ingredients:
4 cups old fashioned oats, not instant
1 cup slivered raw almonds
1 cup whole cashews

1/2 cup sweetened shredded coconut
1 1/2 teaspoon ground cinnamon
1/2 teaspoon salt
3 tablespoons butter
1/4 cup canola oil
1/4 cup honey
1/2 cup brown sugar
1 teaspoon pure vanilla extract

Directions:
Place a rack in the upper third and middle of the oven and preheat to 325 degrees F. Line one large or two small baking sheets with parchment paper (PLEASE NOTE: Parchment paper is not the same as Wax paper-make sure you use PARCHMENT ONLY) and set aside.


Whisk together oats, cashews, slivered almonds, sweetened coconut, cinnamon and salt. Set aside.

In a medium saucepan, melt together butter, oil, honey and brown sugar until the sugar is dissolved and the mixture begins to boil. Carefully whisk together so it's well incorporated. Add the vanilla extract. Pour the warm mixture over the oat and almond mixture and toss together with a wooden spoon, ensuring that all of the oat mixture gets moistened by the sugar and oil mixture.

Spread mixture onto prepared baking sheet(s) and bake for about 25 to 30 minutes, removing the oats to stir and toss on the pan twice during baking. Be careful not to over bake. Remove from the oven, let cool and store in an airtight container for up to two weeks. Serve as cereal, with yogurt or ice cream, or as a tasty trail mix.

Friday, February 11, 2011

Adoption Auction and Fundraising Opportunity


My wonderful friend, Elizabeth from Elizabeth Engelhardt Creations, is hosting an auction for an adorable girl's tutu and leggings with the proceeds going towards our adoption costs. Check out this link and place a bid :). We are so thankful for Elizabeth and her cousin's generous donations. http://www.elizabethengelhardtcreations.com/2011/02/auction.html


We have been so blessed to have Elizabeth Englehardt helping us raise money for our adoption costs. http://www.elizabethengelhardtcreations.com


Elizabeth has become a dear friend of our over the past two years. We were first put in contact with her when we were pregnant with Savannah and she made Savannah's birth announcements. You can see just how beautiful and special they were by clicking here: http://www.elizabethengelhardtcreations.com/p/announcements.html


Not only is Elizabeth hosting an auction for us, but she has so kindly offered to give all proceeds of orders that you place directly to us for our adoption. She does amazing work-thank you cards, baby books, birthday invitations, baby announcements, scrapbook pages, bookmarks, postcards, etc... Every order is custom made and she will make them exactly the way you would like them. So, hop over to her website and take a look. If you decide to place an order then please put "Emma Burrell" in your order notes. And, while you are there, take a moment to pray for her sweet family that God's love will be poured out in abundance on them as they seek to serve and help others. Elizabeth's button is on the corner of this blog...so just click it and you will be taken directly to her website. If you have any questions then just email me at joyouschris@yahoo.com .


We are so thankful for Elizabeth and her cousin's generous donations. I continue to be amazed at the generosity of people who have never met us yet are so willing to help us bring our Emma home. God's love is shining through people like Elizabeth and her cousin!
If you would like to get updates about our adoption process, then just go here to our adoption blog: http://emmacharity.blogspot.com/


Praying her home,
Darin, Christina and Jaythan

Monday, February 7, 2011

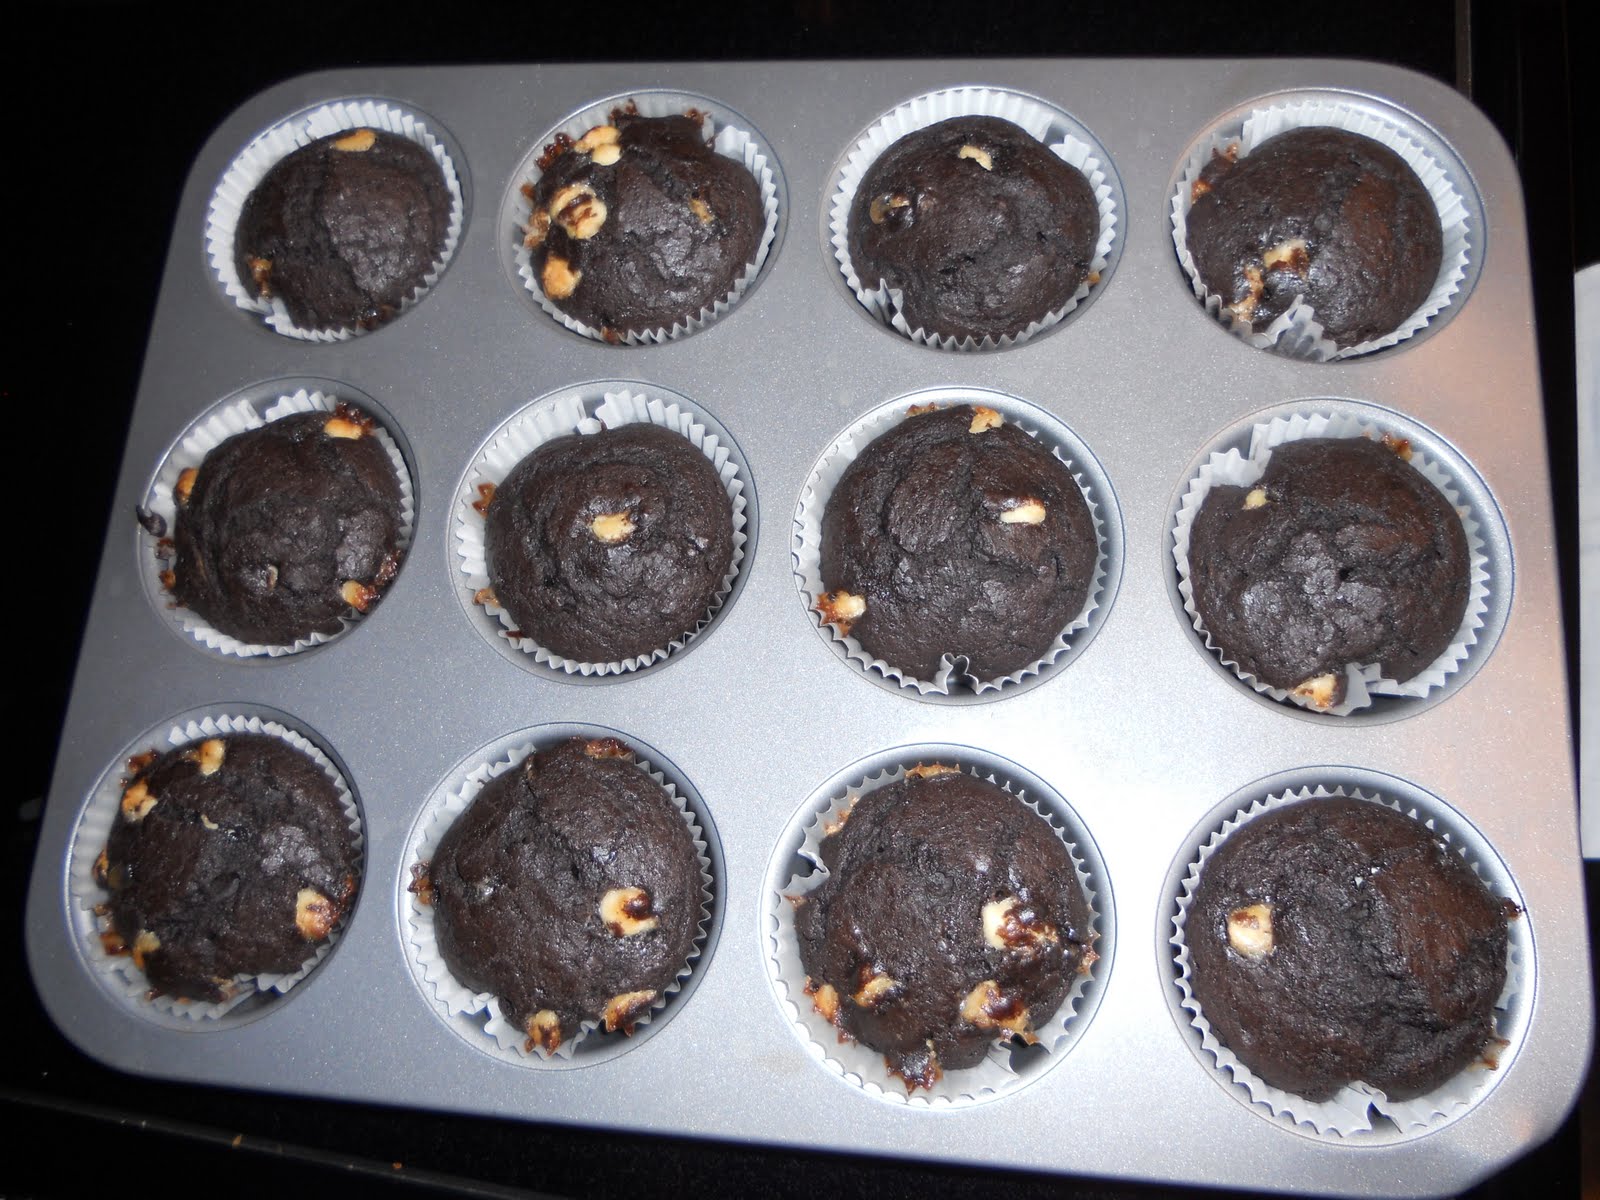
Nothing says Happy Valentines Day like Double Chocolate Muffins for Breakfast!


Another New Muffin Favorite of ours and a HUGE HIT in our Sunday School class at church are these DOUBLE CHOCOLATE MUFFINS. These would be a delectable treat to serve to your family for breakfast on Valentines Day :). Everyone knows that Chocolate is the food of LOVE :).


I am not sure where I came across the recipe, but I love that you use Self-Rising Flour instead of All-Purpose flour, baking soda, salt, and baking powder. It just makes things so much easier. I also love the way the muffin tops have a nice shine to them when you use self-rising flour. In case you are new to baking, self-rising flour eliminates the need for baking powder, baking soda, and salt in a recipe. It is often used when making fruit cobblers.


When I make these muffins, I use white chocolate chips which gives the muffin a slightly sweet flavor and makes them look especially pretty when baked :). You could also use regular chocolate chips, chocolate chunks, butterscotch chips, or the Reeses Peanut Butter chips. I am sure all of the above would taste delicious. These muffins are best served warm with a big glass of cold milk. They are loved by kiddos and adults.


So, show some love this Valentines day, bake a batch of these yummy treats, and serve them on a heart-shaped plate. Your Valentine will surely reward you :)! Enjoy!


You are prayed for and loved!


Double Chocolate Muffins


Ingredients:

2 Cups Self Rising Flour *
1 Cup Sugar
1 Cup Milk
3/4 Cup Cocoa Powder (I use Hersheys Dark Chocolate Cocoa)
1 Egg
1 stick (1/2 cup) margarine or butter, melted
1 -1/2 cups chocolate chips (white, chocolate, butterscotch, peanut butter, etc..)
1 teaspoon pure vanilla extract


Directions:
In large bowl combine flour, sugar, and cocoa powder. In separate bowl mix together melted margarine, egg, milk, and vanilla. Pour wet ingredients into dry ingredients and stir to mix well. Stir in chocolate chips. Divide batter among greased muffin cups or a muffin tin lined with muffin papers. Bake at 400 degrees for twenty minutes. Makes about 18 regular-sized muffins or 8 jumbo muffins.


Saturday, January 29, 2011

Broccoli Chicken Casserole


Last night I wanted something quick, easy, and tasty for dinner. And, I wanted to use ingredients that I already had in my pantry, refrigerator, and freezer. So, I turned to one of my favorite cooking magazines, TASTE OF HOME, and made a delicious and healthy Broccoli Chicken Casserole. I had all of these ingredients on hand, and our entire dinner was ready in about 30-40 minutes. I added some biscuits on the side and dinner was divine! This turned out super healthy because I used the reduced fat Campbell's Broccoli Cheese Soup and 2% cheese for the topping. I used a box of Stouffers Cranberry Stuffing Mix that I got on clearance after Thanksgiving for 25 cents a box. The Cranberries in the stuffing added a sweet hint to this savory dish. Enjoy!


You are prayed for and loved dearly by your Heavenly Father! Take time to thank Him today for the little blessings in your life.


"Give thanks to the LORD, for he is good; his love endures forever."


Broccoli Chicken Casserole


Ingredients:
1-1/2 cups water
1 package (6 ounces) chicken stuffing mix (any flavor will work)
2 cups cubed cooked chicken (I used Canned Chicken)
1 cup frozen broccoli florets, thawed
1 can (10-3/4 ounces) condensed broccoli cheese soup, undiluted
1 cup (4 ounces) shredded cheddar cheese


Directions:
In a small saucepan, bring water to a boil. Stir in stuffing mix.
Remove from the heat; cover and let stand for 5 minutes.
Meanwhile, layer chicken and broccoli in a greased 11-in. x 7-in.
baking dish. Top with soup. Fluff stuffing with a fork; spoon over
soup. Sprinkle with cheese.
Bake, uncovered, at 350° for 30-35 minutes or until heated
through. Yield: 6 servings.

Wednesday, January 26, 2011

Chocolate Banana Bread-YUM!

I have been on a baking kick recently, trying new recipes, and reinventing old ones. This recipe for Chocolate Banana Bread turned out exceptionally well, and I have made it four times since my first trial. It is super easy and your kids will love it! It would make a perfect after-school snack. Adults will love it too :). Enjoy!

You are Prayed for my dear friends!

Chocolate Banana Bread
Ingredients:
1 cup sugar
2 eggs
1/3 cup vegetable oil
3 ripe bananas, mashed
1 tsp. vanilla
1 1/2 cups flour
1/2 cup cocoa
1/2 tsp. salt
1 tsp. baking soda
1/2 cup chocolate chips
Directions:
Heat oven to 350 and grease your loaf pan. Beat eggs, sugar and oil on medium until combined. Beat in banana and vanilla on low speed. In a separate bowl stir together flour, cocoa, soda and salt. Stir with banana mixture until combined. Stir in chocolate chips. Pour into pan. Bake 60-70 minutes or until a toothpick comes out clean. Cool 10 minutes, remove from pan.
TIPS:I like to freeze overripe bananas in a ziploc bag and thaw them about an hour before I am going to make bread. Pour the bananas and their juice into the bread to make it extra moist. To soften butter, microwave in a bowl for 10-15 seconds. You could substitute the chocolate chips for butterscotch or white chocolate chips for a different twist. You can buy really cute seasonal ceramic mini loaf pans at Michaels Craft stores for only $1. These make great gifts and the receiver gets to keep a beautiful pan.

Friday, January 14, 2011

OOEY GOOEY CHOCOLATE BUTTER CAKE will make you wanna say "Thanks Ya'll"

So, now that I am in my second trimester of pregnancy,the nausea/all-day sickness has started to gradually get better, I have begun cooking and baking agan. During the last three months, my poor hubby lived off of Campbells Chunky Soup, Hot Pockets, and the generosity of a dear neighbor who would bring him homecooked meals. But, alas, I am starting to feel better, and I have begun cooking him some superb meals and desserts if I do say so myself. Last night, I made him homemade chili, the homemade whole wheat colonial bread (that I posted yesterday), and this awesome "Ooey Gooey Chocolate Butter Cake" (as my son and I deemed it) by Paula Deen. If you know anything at all about Paula Deen and her recipes, then you realize that this will include lots of butter and other sinfully delicious ingredients.
The cake actually resembles a brownie-it has a brownie crust bottom with an insanely rich and decadent topping that involves lots of butter and cream cheese. No, this is not a healthy recipe, but it is baked full of love and will be sure to please the men and chocolate lovers in your life. I think it is best served warm with a scoop of vanilla bean ice cream drizzled with hot fudge topping. Enjoy and remember you are dearly loved by your Heavenly Father!! Thanks Ya'll!

Psalm 19:9-10

"Reverence for the Lord is pure, lasting forever.The laws of the Lord are true; each one is fair. They are more desirable than gold, even the finest gold. They are sweeter than honey, even honey dripping from the comb."

OOEY GOOEY CHOCOLATE BUTTER CAKE

Ingredients:
1 (18.25 ounce) package chocolate cake mix (I used Devil's Food)
3 large eggs
1 cup (2 sticks) unsalted butter, melted, plus butter to grease your pan
1 (8-ounce) package cream cheese, at room temperature
3 to 4 tablespoons unsweetened cocoa powder, to taste
1 (16-ounce) box powdered (confectioners') sugar
1 teaspoon vanilla extract
1 cup chopped unsalted nuts, optional (I omitted these)
Whipped Cream, Cool Whip, or Ice Cream for topping, optional
Directions:

Preheat oven to 350 degrees F.
Lightly butter or spray with cooking spray
a 13-by-9-inch baking pan ( I used to 9 inch square pans). In a large bowl, combine the cake mix, 1 egg, and 1/2 cup (1 stick) melted butter, and stir until well blended. Pat mixture into prepared pan and set aside. In a stand mixer, or with a hand mixer, beat the cream cheese until smooth. Add the remaining 2 eggs, and the cocoa powder. Lower the speed of the mixer, and add the powdered sugar. Continue beating until ingredients are well mixed. Slowly add the remaining 1/2 cup (1 stick) of melted butter, and the vanilla, continuing to beat the mixture until smooth. Stir in the nuts (if using) with a rubber spatula. Spread filling over cake mixture in pan.
Bake for 40 to 50 minutes. Be careful not to overbake the cake
; the center should still be a little gooey when finished baking. Let cake partially cool on a wire rack before cutting into pieces. Serve warm with whipped cream or ice cream, if desired. You can also serve them at room temperature like a brownie. Enjoy!!